> ## Documentation Index
> Fetch the complete documentation index at: https://docs.flowpayroll.ai/llms.txt
> Use this file to discover all available pages before exploring further.
# Running a pay run
> Walk through the pay run wizard end to end — from opening a period to locking it and submitting your FPS to HMRC.
The pay run wizard takes you from a blank period to a locked, reported payroll in seven steps. Each step is reachable at any time from the horizontal step bar at the top of the screen. Use the **Previous** and **Next** buttons at the bottom to move between steps, or click a step directly to jump to it.
Before running your first pay run, make sure your organisation settings, at least one pay run schedule, and your people are all set up. See [getting started](/guides/getting-started) if you haven't done that yet.
 ## Starting a pay run
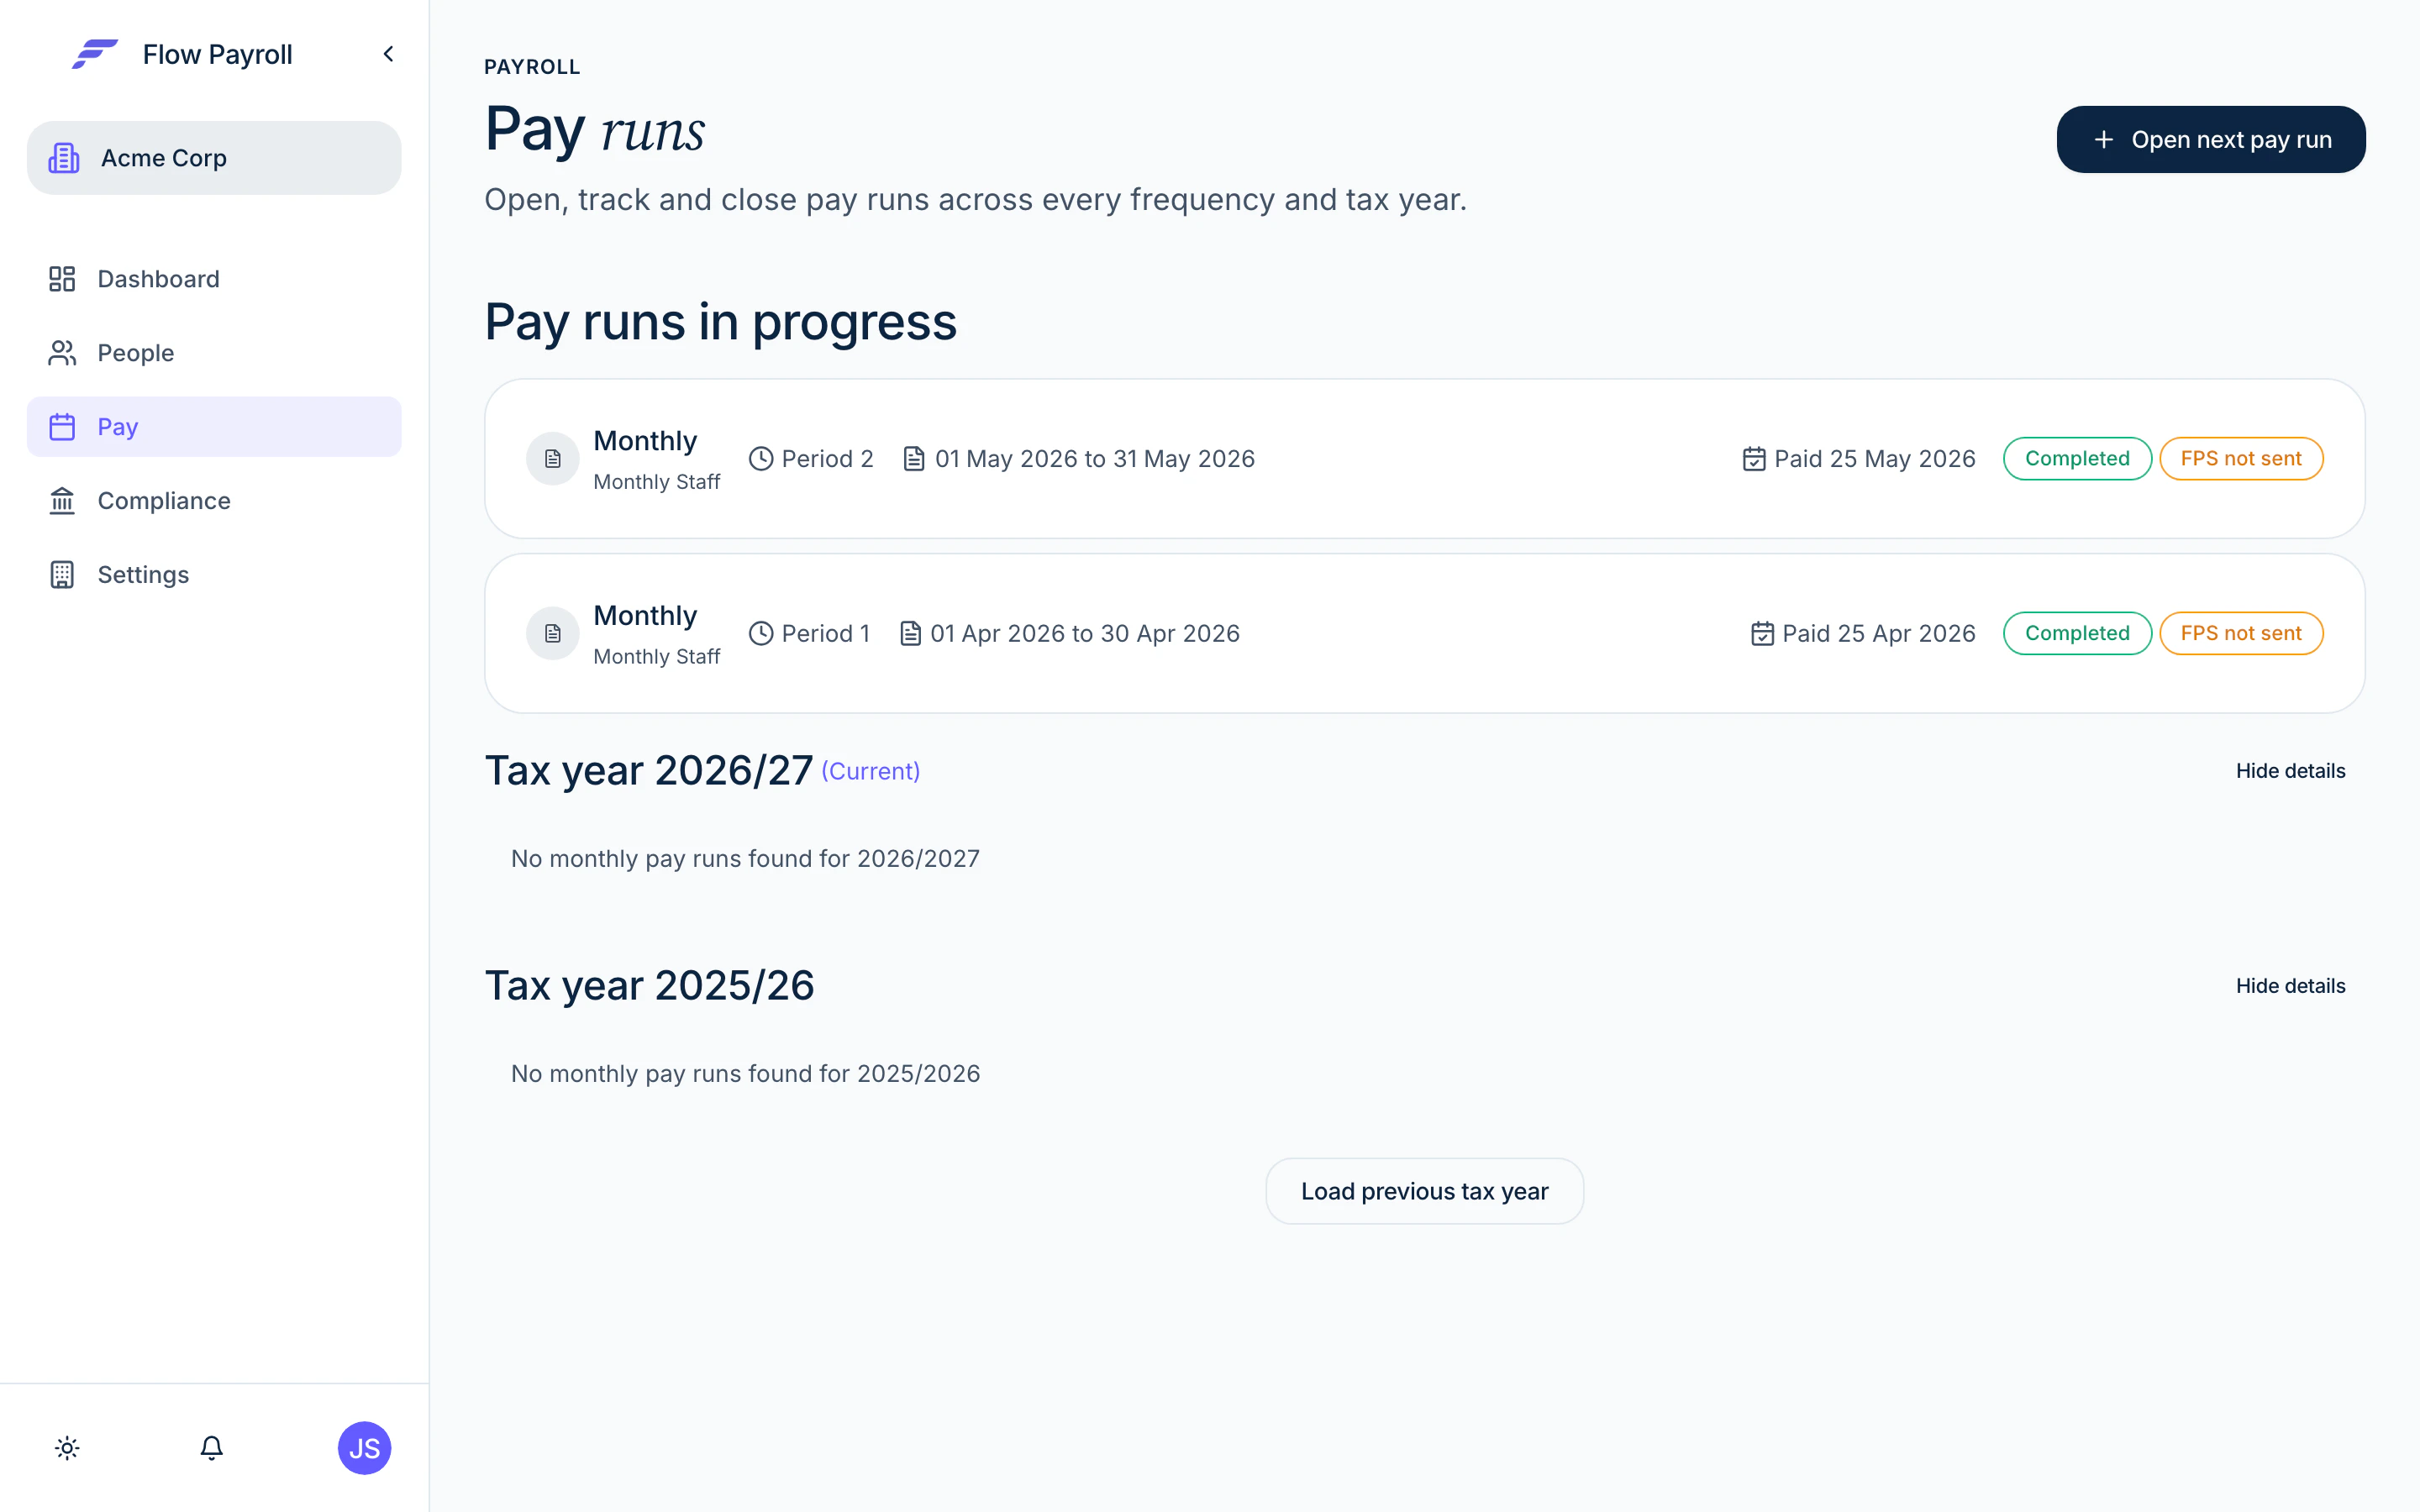
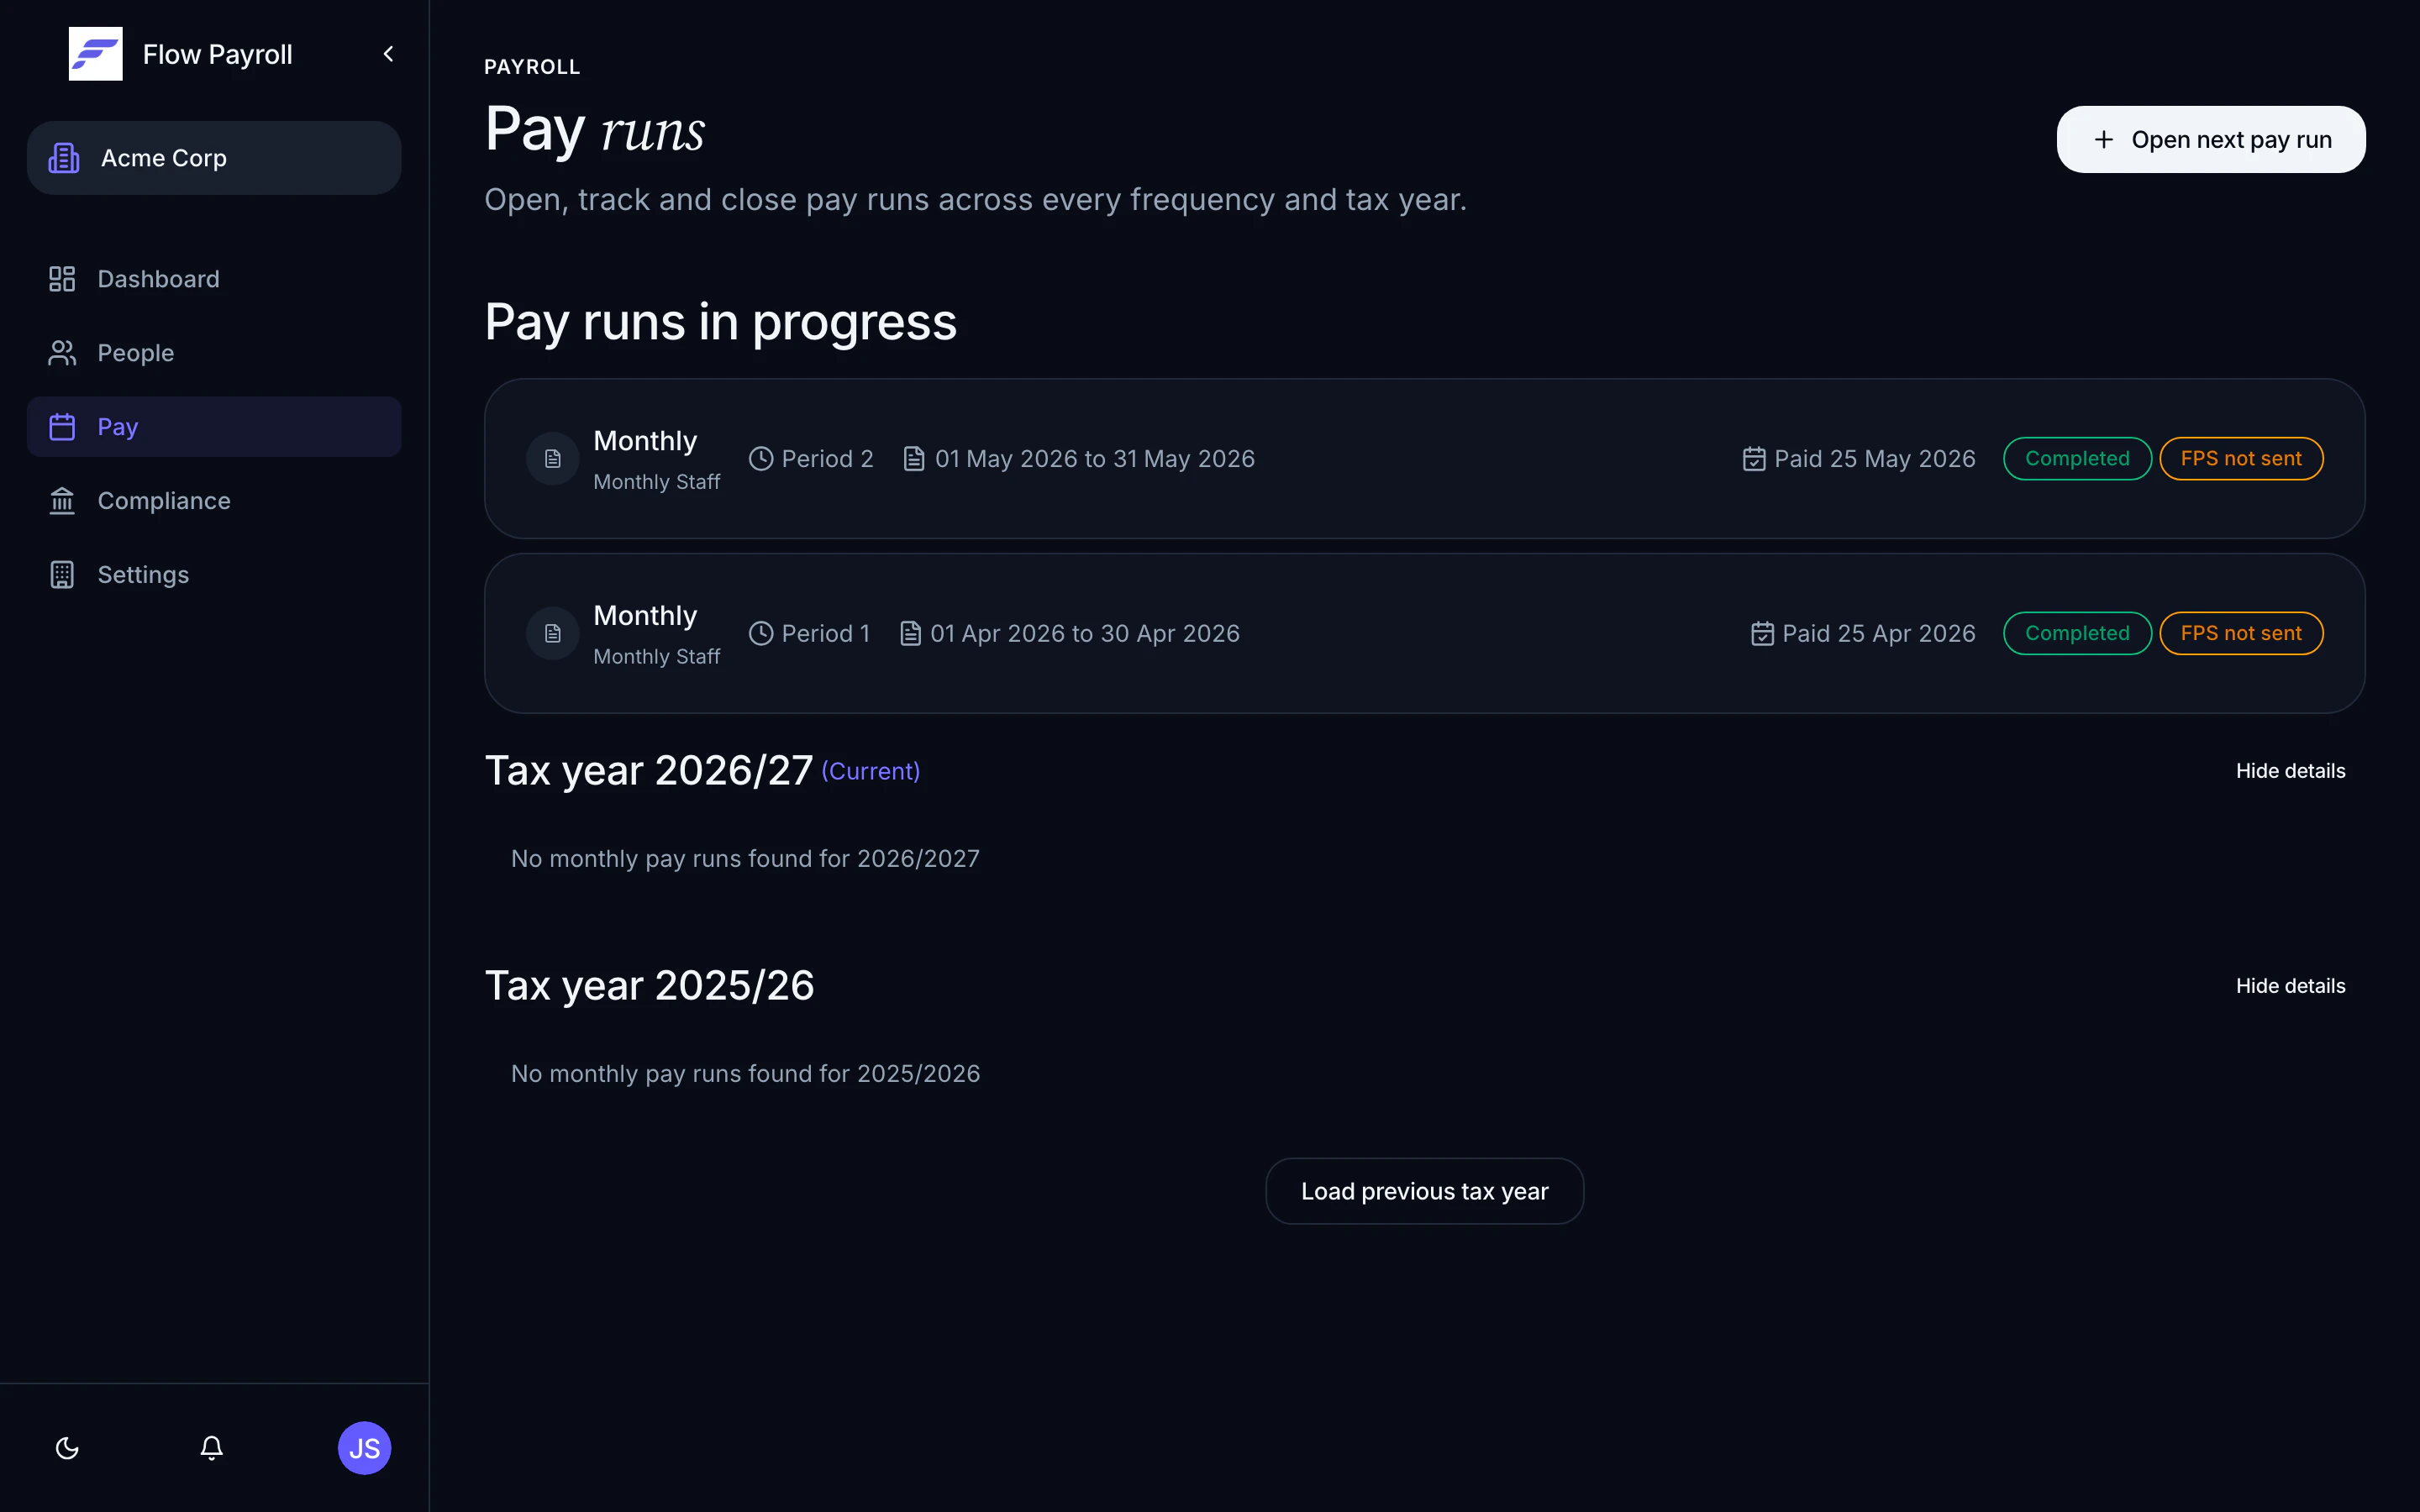
Go to **Pay runs** in the main navigation. The page shows pay runs in progress, grouped by pay frequency.
Select **Open next pay run** (or **Start new pay run** if this is your first). A confirmation modal shows the suggested pay schedule, tax year, and period — and lets you override the payment date if needed. Confirm, and the wizard opens at step 1.
Flow Payroll suggests the next sequential period automatically. You must lock the current period before rolling into a new tax year.
***
## The seven wizard steps
The payments step is a split-panel view: the employee list on the left, pay lines for the selected employee on the right.
**Reviewing what's already there**
Every employee on the pay schedule appears with their calculated payslip. Statutory pay (SSP, SMP, SPP, and so on), recurring payments, and court-order deductions that were set up on the employee's profile are already applied. Select an employee to inspect their individual lines.
**Adding a one-off payment or deduction**
Select an employee, then choose **Add payment** or **Add deduction**. Pick the pay element, enter the amount and quantity, and save. The payslip recalculates immediately.
**Importing in bulk from CSV**
If you have many lines to enter, use **Import payments from CSV** or **Import deductions from CSV**. The import flow has five steps:
1. Upload your CSV file.
2. Map your columns to the required fields (`Employee Identifier`, `Pay Element Code`, `Rate / Amount`, and optionally `Quantity/Units`, `Unit Type`, and `Date`).
3. Validate — rows with errors are highlighted; fix them in the file and re-upload, or skip the errored rows.
4. Review the validated lines.
5. Confirm to import all valid rows.
Employees can be matched by payroll ID, email address, NI number, or employee code — use the `Identifier Type` column to specify which.
**Alert filters**
The search bar and alert-code chips above the employee list let you filter to employees with specific issues — for example, employees flagged for a pension alert. Clicking through from the Alerts step (step 2) pre-filters the list automatically.
Statutory payments, pension contributions, and court-order deductions are calculated automatically. You do not need to enter them manually here. See [statutory payments](/guides/compliance/statutory-payments), [auto-enrolment](/guides/pensions/auto-enrolment), and [court orders](/guides/compliance/court-orders) for more detail.
The alerts step surfaces anything that needs your attention before you lock the period.
Alerts fall into two categories:
* **Blocking alerts** — must be resolved before you can lock. These include employees who need to be enrolled into a pension but haven't been yet, and similar compliance issues.
* **Advisory alerts** — informational flags that you can acknowledge and proceed past.
Pension alerts show workers who are eligible for auto-enrolment but whose enrolment is not yet complete. You can enrol workers individually or in batch from here. Clicking **Go to payments** on a pension alert pre-filters the payments step to that worker.
**Leaver on this pay run** flags employees whose leaving date is being reported to HMRC on this submission, so you can check the dates before you finalise. If someone left before this pay period even started, the alert is raised as a warning instead — that means the leaving date missed its own pay run and is only reaching HMRC now. See [leavers](/guides/people/leavers).
Once all blocking alerts are resolved the step shows a green summary and you can move to locking.
How Flow Payroll assesses and enrols workers each pay run.
Locking finalises the period. Before you lock, review the summary information on this step:
* The lock status card tells you whether the pay run is already locked or still open.
* If unlocked, a list of what locking will do is shown: employee data and calculations are finalised, payslips are generated and can no longer be modified, RTI submission becomes available, and reporting documents can be generated.
Select **Lock pay run** and confirm the prompt. Locking is irreversible — you cannot edit pay lines after this point.
Once locked, the step shows a success state with the lock date and the user who locked it.
Locking cannot be undone. Verify your payments and resolve all blocking alerts before locking.
After locking, this step shows the full payslip list for the period.
* Search by employee name, payroll ID, NI number, or payroll code.
* Select individual payslips or use **Select all** to select every employee shown.
* **View** opens the payslip in a preview modal — payslips are marked **Final** once the period is locked, or **Preview** if viewed before locking.
* **Download** saves an individual payslip as a PDF.
* **Download selected** bundles the selected payslips into a single zip file.
* **Email payslips** sends a notification to selected employees with a link to their payslip.
What payslips show, how to share them, and how employees access them.
This step manages your Full Payment Submission (FPS) to HMRC.
**Before submitting**
The validation card confirms the pay run is locked and completed. The pay run summary card shows the total employee count, how many processed successfully, and how many (if any) failed.
**Generating a preview**
Select **Preview FPS** to generate the FPS XML without submitting it to HMRC. Once the preview is ready, you can:
* **View preview** — inspect the XML in a viewer panel.
* **Export PDF** — download a formatted PDF report of the FPS data.
* **Export CSV** — download the FPS data as a spreadsheet.
* **Regenerate preview** — rebuild the preview after any late changes.
**Submitting**
Select **Submit FPS to HMRC** and confirm. The submission status updates automatically every few seconds while HMRC processes the file. Once accepted, the status changes to **Sent** and the submission ID and date are shown.
**Final submission**
For the last pay period of the tax year, the **Final submission** toggle is pre-enabled. You can also enable it manually and specify whether the scheme is ceasing. Only mark a submission as final on the last FPS of the tax year — incorrect use can cause HMRC processing issues.
**If submission fails**
The status changes to **Failed** and any error codes from HMRC are listed. Correct the underlying issue, then resubmit. If HMRC returns a "final submission required" response, a form appears asking you to confirm the final submission details before resubmitting.
The FPS must reach HMRC on or before your pay day. Late submissions may attract a penalty.
FPS, EPS, resubmissions, and HMRC notices.
This step provides access to the reports and documents generated from the period's payslip data. Download or view the reports you need for your finance team, pension provider, or audit records.
The summary step shows the totals for the completed pay run:
| Field | What it shows |
| ---------------------- | --------------------------------------------------------------------- |
| Pay period | Start date, end date, pay date |
| Total due to employees | Combined net pay across all employees |
| Total due to HMRC | PAYE tax + employee NI + employer NI + student and postgraduate loans |
| Total due to pension | Employee + employer pension contributions |
| Total cost of pay run | Sum of the three totals above |
The detailed breakdown expands into gross pay, net pay, PAYE deductions, student loan, postgraduate loan, NI split by employee/employer/Class 1A, and pension contributions split by employee/employer.
If a pay run checklist is enabled for your organisation, it appears here so you can mark off your end-of-period tasks before closing.
***
## Pay run statuses
| Status | Meaning |
| ----------- | ------------------------------------ |
| Open | Created but not yet locked |
| In progress | Being processed after a lock request |
| Completed | Locked and processed |
| Closed | Fully finalised (tax year closed) |
The FPS status is shown as a separate badge alongside the pay run status: **FPS not sent**, **FPS sending**, **FPS sent**, or **FPS failed**.
***
## How statutory pay, pensions, and court orders fold in
You do not need to calculate or enter these manually:
* **Statutory payments** (SSP, SMP, SPP, and so on) — set up on the employee's profile and applied automatically each period they are applicable.
* **Pension contributions** — assessed and calculated automatically each period based on the worker's enrolment status and the contribution rates on your pension configuration.
* **Court orders** — deducted automatically according to the order type, rate, and protected earnings threshold configured on the employee.
All three appear as line items in the payments step so you can verify them. The alerts step surfaces any pension compliance issues that need resolution before locking.
***
## Where to go next
Preview, download, and send payslips to your employees.
Submit your FPS, file your EPS, and handle resubmissions.
SSP, SMP, SPP, and other statutory pay types.
Pension assessment, enrolment, and contributions.
## Starting a pay run
Go to **Pay runs** in the main navigation. The page shows pay runs in progress, grouped by pay frequency.
Select **Open next pay run** (or **Start new pay run** if this is your first). A confirmation modal shows the suggested pay schedule, tax year, and period — and lets you override the payment date if needed. Confirm, and the wizard opens at step 1.
Flow Payroll suggests the next sequential period automatically. You must lock the current period before rolling into a new tax year.
***
## The seven wizard steps
The payments step is a split-panel view: the employee list on the left, pay lines for the selected employee on the right.
**Reviewing what's already there**
Every employee on the pay schedule appears with their calculated payslip. Statutory pay (SSP, SMP, SPP, and so on), recurring payments, and court-order deductions that were set up on the employee's profile are already applied. Select an employee to inspect their individual lines.
**Adding a one-off payment or deduction**
Select an employee, then choose **Add payment** or **Add deduction**. Pick the pay element, enter the amount and quantity, and save. The payslip recalculates immediately.
**Importing in bulk from CSV**
If you have many lines to enter, use **Import payments from CSV** or **Import deductions from CSV**. The import flow has five steps:
1. Upload your CSV file.
2. Map your columns to the required fields (`Employee Identifier`, `Pay Element Code`, `Rate / Amount`, and optionally `Quantity/Units`, `Unit Type`, and `Date`).
3. Validate — rows with errors are highlighted; fix them in the file and re-upload, or skip the errored rows.
4. Review the validated lines.
5. Confirm to import all valid rows.
Employees can be matched by payroll ID, email address, NI number, or employee code — use the `Identifier Type` column to specify which.
**Alert filters**
The search bar and alert-code chips above the employee list let you filter to employees with specific issues — for example, employees flagged for a pension alert. Clicking through from the Alerts step (step 2) pre-filters the list automatically.
Statutory payments, pension contributions, and court-order deductions are calculated automatically. You do not need to enter them manually here. See [statutory payments](/guides/compliance/statutory-payments), [auto-enrolment](/guides/pensions/auto-enrolment), and [court orders](/guides/compliance/court-orders) for more detail.
The alerts step surfaces anything that needs your attention before you lock the period.
Alerts fall into two categories:
* **Blocking alerts** — must be resolved before you can lock. These include employees who need to be enrolled into a pension but haven't been yet, and similar compliance issues.
* **Advisory alerts** — informational flags that you can acknowledge and proceed past.
Pension alerts show workers who are eligible for auto-enrolment but whose enrolment is not yet complete. You can enrol workers individually or in batch from here. Clicking **Go to payments** on a pension alert pre-filters the payments step to that worker.
**Leaver on this pay run** flags employees whose leaving date is being reported to HMRC on this submission, so you can check the dates before you finalise. If someone left before this pay period even started, the alert is raised as a warning instead — that means the leaving date missed its own pay run and is only reaching HMRC now. See [leavers](/guides/people/leavers).
Once all blocking alerts are resolved the step shows a green summary and you can move to locking.
How Flow Payroll assesses and enrols workers each pay run.
Locking finalises the period. Before you lock, review the summary information on this step:
* The lock status card tells you whether the pay run is already locked or still open.
* If unlocked, a list of what locking will do is shown: employee data and calculations are finalised, payslips are generated and can no longer be modified, RTI submission becomes available, and reporting documents can be generated.
Select **Lock pay run** and confirm the prompt. Locking is irreversible — you cannot edit pay lines after this point.
Once locked, the step shows a success state with the lock date and the user who locked it.
Locking cannot be undone. Verify your payments and resolve all blocking alerts before locking.
After locking, this step shows the full payslip list for the period.
* Search by employee name, payroll ID, NI number, or payroll code.
* Select individual payslips or use **Select all** to select every employee shown.
* **View** opens the payslip in a preview modal — payslips are marked **Final** once the period is locked, or **Preview** if viewed before locking.
* **Download** saves an individual payslip as a PDF.
* **Download selected** bundles the selected payslips into a single zip file.
* **Email payslips** sends a notification to selected employees with a link to their payslip.
What payslips show, how to share them, and how employees access them.
This step manages your Full Payment Submission (FPS) to HMRC.
**Before submitting**
The validation card confirms the pay run is locked and completed. The pay run summary card shows the total employee count, how many processed successfully, and how many (if any) failed.
**Generating a preview**
Select **Preview FPS** to generate the FPS XML without submitting it to HMRC. Once the preview is ready, you can:
* **View preview** — inspect the XML in a viewer panel.
* **Export PDF** — download a formatted PDF report of the FPS data.
* **Export CSV** — download the FPS data as a spreadsheet.
* **Regenerate preview** — rebuild the preview after any late changes.
**Submitting**
Select **Submit FPS to HMRC** and confirm. The submission status updates automatically every few seconds while HMRC processes the file. Once accepted, the status changes to **Sent** and the submission ID and date are shown.
**Final submission**
For the last pay period of the tax year, the **Final submission** toggle is pre-enabled. You can also enable it manually and specify whether the scheme is ceasing. Only mark a submission as final on the last FPS of the tax year — incorrect use can cause HMRC processing issues.
**If submission fails**
The status changes to **Failed** and any error codes from HMRC are listed. Correct the underlying issue, then resubmit. If HMRC returns a "final submission required" response, a form appears asking you to confirm the final submission details before resubmitting.
The FPS must reach HMRC on or before your pay day. Late submissions may attract a penalty.
FPS, EPS, resubmissions, and HMRC notices.
This step provides access to the reports and documents generated from the period's payslip data. Download or view the reports you need for your finance team, pension provider, or audit records.
The summary step shows the totals for the completed pay run:
| Field | What it shows |
| ---------------------- | --------------------------------------------------------------------- |
| Pay period | Start date, end date, pay date |
| Total due to employees | Combined net pay across all employees |
| Total due to HMRC | PAYE tax + employee NI + employer NI + student and postgraduate loans |
| Total due to pension | Employee + employer pension contributions |
| Total cost of pay run | Sum of the three totals above |
The detailed breakdown expands into gross pay, net pay, PAYE deductions, student loan, postgraduate loan, NI split by employee/employer/Class 1A, and pension contributions split by employee/employer.
If a pay run checklist is enabled for your organisation, it appears here so you can mark off your end-of-period tasks before closing.
***
## Pay run statuses
| Status | Meaning |
| ----------- | ------------------------------------ |
| Open | Created but not yet locked |
| In progress | Being processed after a lock request |
| Completed | Locked and processed |
| Closed | Fully finalised (tax year closed) |
The FPS status is shown as a separate badge alongside the pay run status: **FPS not sent**, **FPS sending**, **FPS sent**, or **FPS failed**.
***
## How statutory pay, pensions, and court orders fold in
You do not need to calculate or enter these manually:
* **Statutory payments** (SSP, SMP, SPP, and so on) — set up on the employee's profile and applied automatically each period they are applicable.
* **Pension contributions** — assessed and calculated automatically each period based on the worker's enrolment status and the contribution rates on your pension configuration.
* **Court orders** — deducted automatically according to the order type, rate, and protected earnings threshold configured on the employee.
All three appear as line items in the payments step so you can verify them. The alerts step surfaces any pension compliance issues that need resolution before locking.
***
## Where to go next
Preview, download, and send payslips to your employees.
Submit your FPS, file your EPS, and handle resubmissions.
SSP, SMP, SPP, and other statutory pay types.
Pension assessment, enrolment, and contributions.