> ## Documentation Index
> Fetch the complete documentation index at: https://docs.flowpayroll.ai/llms.txt
> Use this file to discover all available pages before exploring further.
# Onboarding employees
> Add a new employee individually through the onboarding wizard, or import multiple employees at once via CSV.
When someone joins your organisation you need to add them to Flow Payroll before they can appear in a pay run. You can add one person at a time using the onboarding wizard, or import many people at once using the CSV importer.
 ## Before you start
Have these details to hand for each new starter:
* Full legal name, email address, date of birth, and birth gender.
* National Insurance number (or at least two lines of home address if no NI number yet).
* Start date and starter declaration (A, B, or C).
* Tax code — if you have a P45 from a previous employer, bring the P45 gross and tax figures too.
* NI category (usually A for employees under State Pension age).
* Bank account details (sort code, account number, account holder name).
* The payroll schedule this person belongs to.
## Adding an employee individually
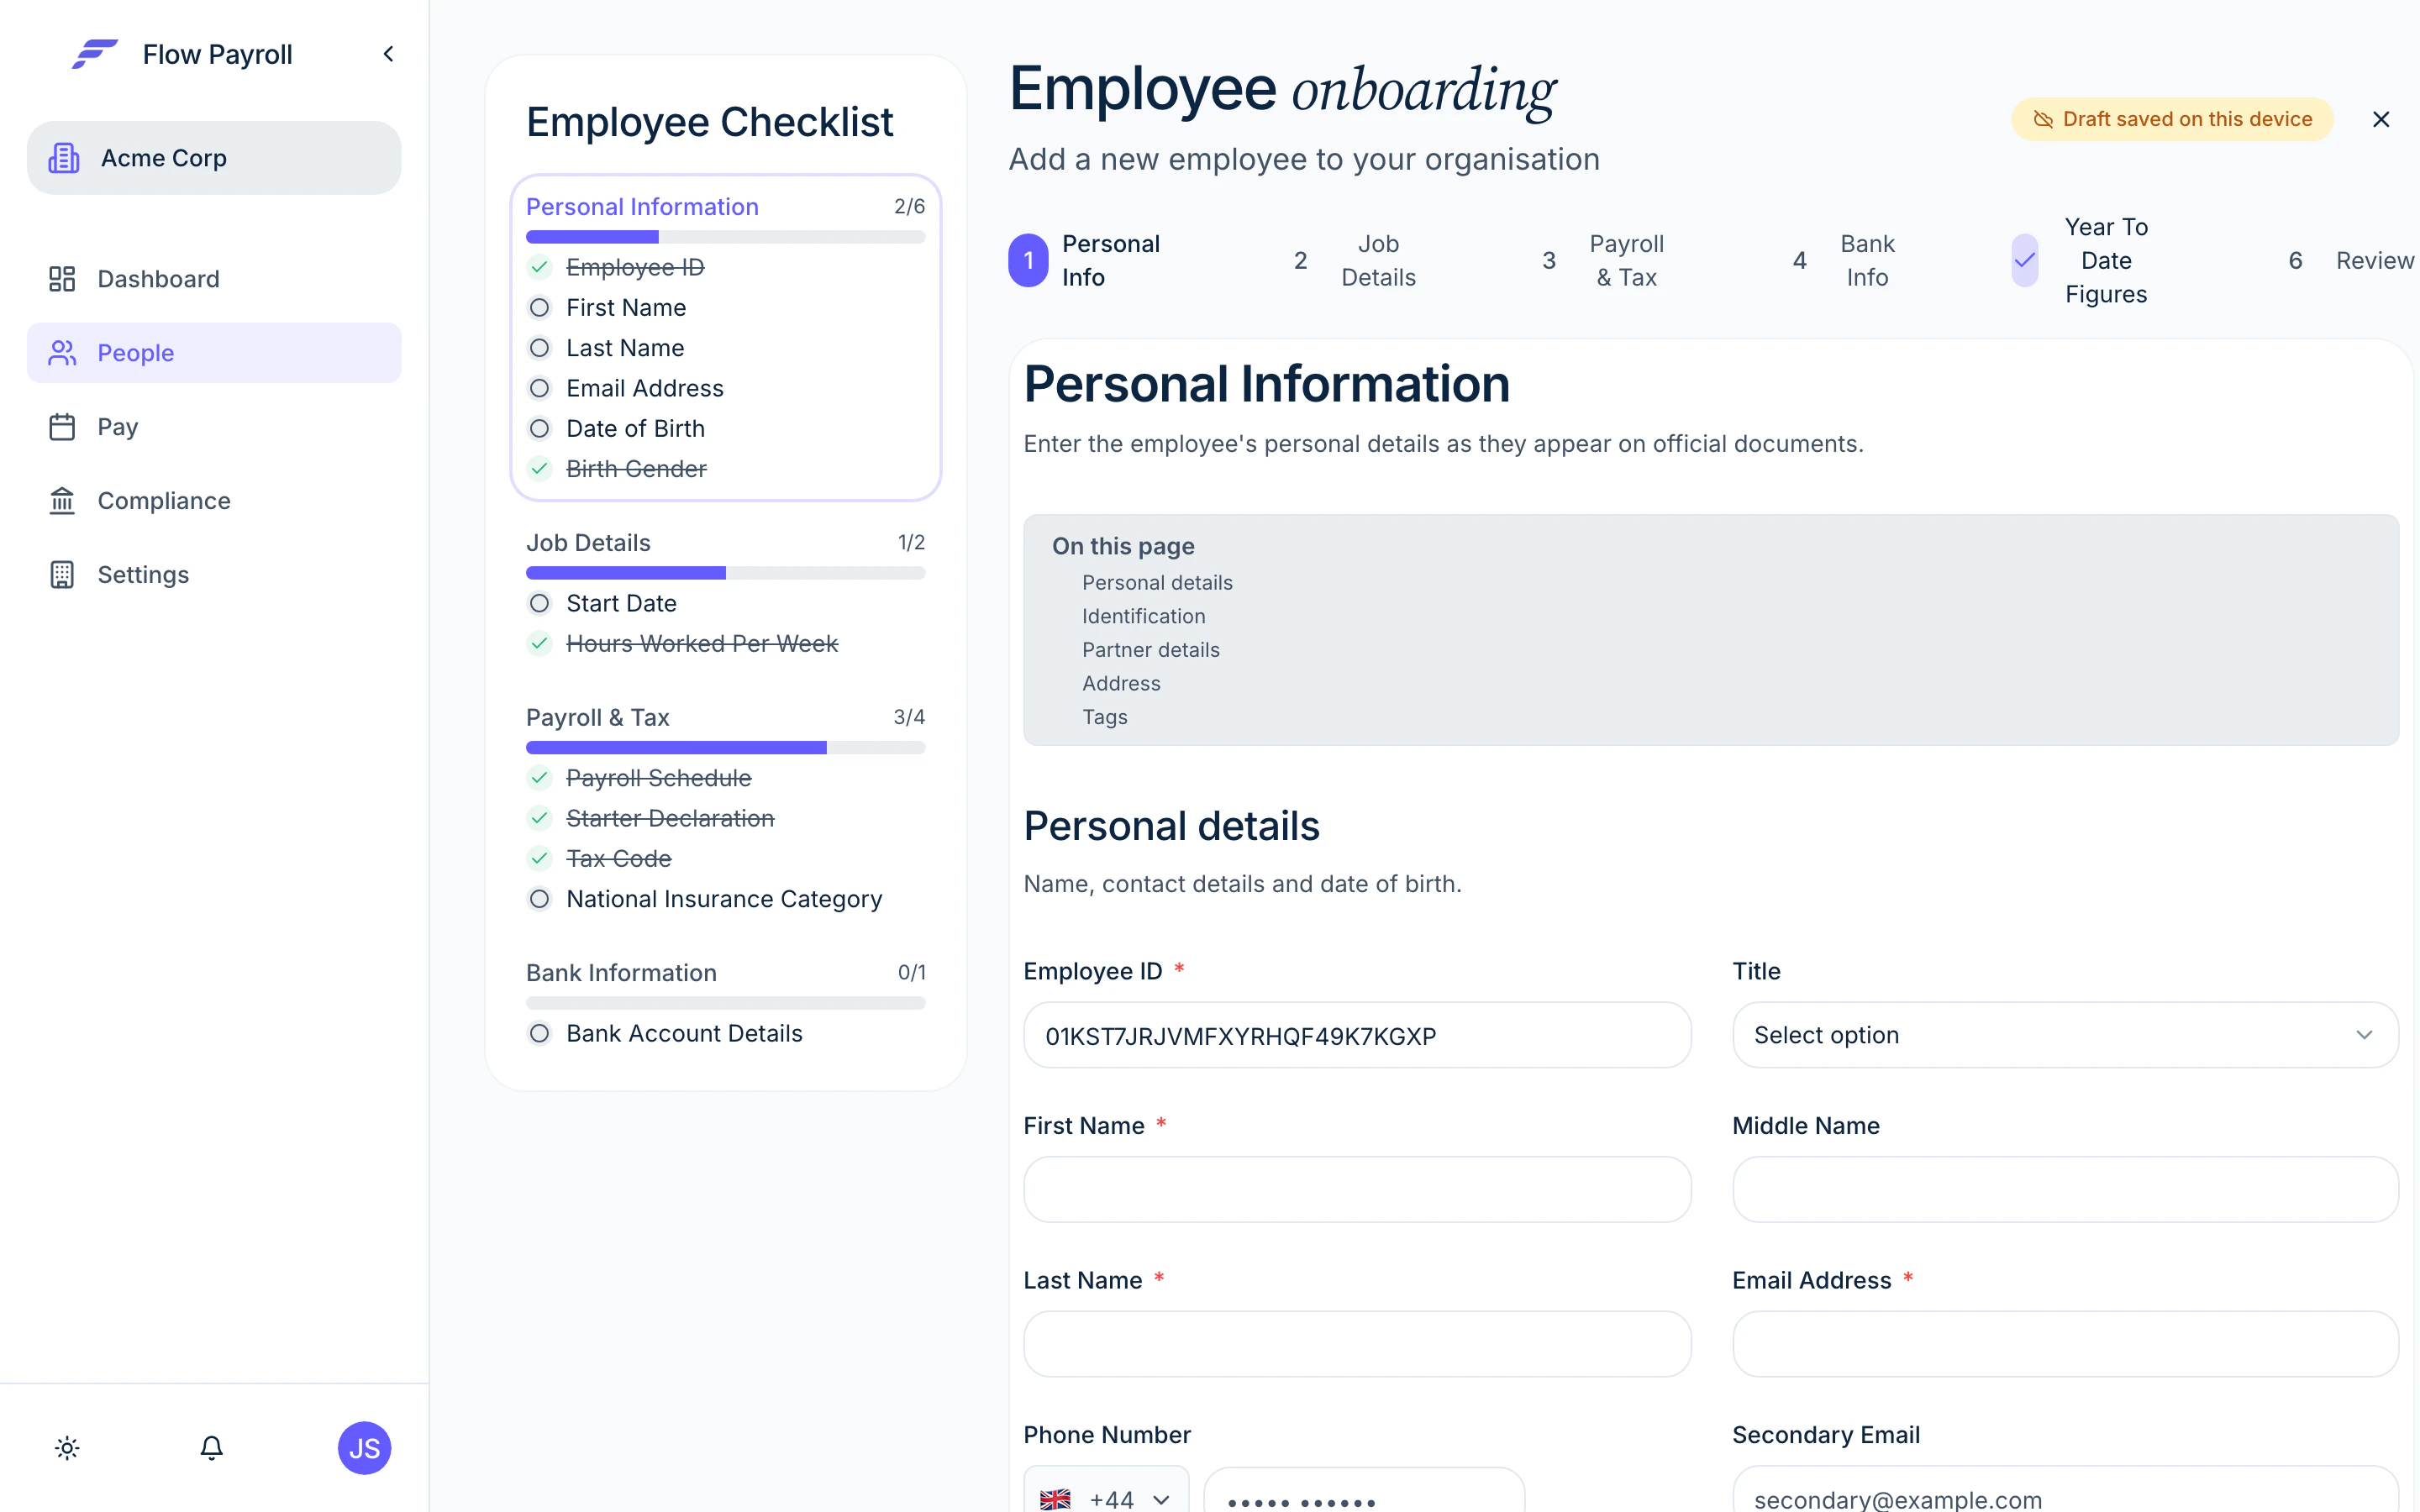
Go to **People**, make sure you are on the **Team** tab, and click **Add employee**. The wizard opens with a checklist sidebar on the left that tracks your progress through each step.
Enter the employee's personal details exactly as they appear on official documents — HMRC validates these fields on the FPS. Required fields are:
* **Employee ID** (auto-generated, but you can change it)
* **First name** and **last name**
* **Email address**
* **Date of birth**
* **Birth gender**
Optional but useful: title, middle name, phone number, NI number, passport number, marital status, home address, and tags. Partner details (name and NI number) are needed for Statutory Shared Parental Pay.
If you don't have the NI number yet, enter at least two lines of the employee's home address — HMRC requires one or the other on the FPS.
Fill in the employment specifics:
* **Start date** — required.
* **Hours worked per week** — choose the band (up to 16, 16–24, 24–30, above 30, or other). This is an HMRC-required field.
* **Job title** and **department** — optional, but used for filtering and reporting.
* **Working pattern** — tick the days the employee typically works.
* **Irregular payment pattern** — toggle on if pay varies and there is no regular cycle.
* **Off payroll worker (IR35)** — toggle on for workers inside IR35.
This step contains four required items and several optional ones.
**Required:**
* **Payroll schedule** — assign the employee to an existing pay run configuration.
* **Starter declaration** — select A, B, or C based on what the employee has told you:
* **A** — first job since 6 April, no other job or pension.
* **B** — this is their only job (they may have another source of income but no other employment).
* **C** — they have another job or receive a pension.
* **Tax code** — enter the code for the current tax year (for example `1257L`). If you have a P45 from the previous employer, use the code shown there. Otherwise use the emergency code appropriate to the starter declaration. Tick **W1/M1** if the code should be applied on a non-cumulative basis.
* **NI category** — select the appropriate HMRC NI category letter. Category **A** applies to most employees. The wizard can suggest a category based on date of birth when you have provided it.
**Optional:**
* **Salary** — the annual gross salary for reference.
* **Director settings** — appointment date and NIC calculation method if the employee is a company director.
* **Student loan** — plan type (Plan 1, 2, 4, or 5) and dates if applicable.
* **Postgraduate loan** — if the employee has a postgraduate loan.
* **Pension** — assign the employee to a pension group at onboarding. Auto-enrolment assessment runs every pay run regardless, but you can manually assign a group here.
* **Holiday policy** — attach a holiday accrual policy.
If you have the employee's P45 from a previous employer, enter the **previous employment gross taxable pay** and **previous employment tax paid** in the **Payroll & tax** tab after onboarding, or supply them in the **Previous employment** card inside the wizard's Payroll & tax step. This ensures tax is calculated correctly in the first pay run.
Enter the employee's bank account details. All three fields are required when providing bank details:
* **Account holder name**
* **Account number** (8 digits)
* **Sort code** (6 digits)
You can add more than one account and set the percentage of pay allocated to each. The percentages must total 100.
This step is for employees joining mid-tax-year who have already had pay processed elsewhere. Enter the cumulative figures from their P60 or last payslip so that tax and NI calculations for the remainder of the year are correct:
* YTD gross, taxable pay, and tax paid.
* YTD employee and employer NI.
* YTD student loan and postgraduate loan deductions.
* Statutory pay received to date (SSP, SMP, SPP, SAP, ShPP, SPBP, SNCP).
* Pension contributions.
You can skip this step if the employee is joining at the start of the tax year or if you are onboarding them for the first time and have no prior figures.
The **Review** step shows a summary of every section. Scroll through to check the details. Click **Save employee** to create the record. The checklist sidebar shows a tick on every completed section — any incomplete required fields are highlighted before you can save.
After saving, you are taken to the new employee's record where you can continue adding details.
## Draft saving
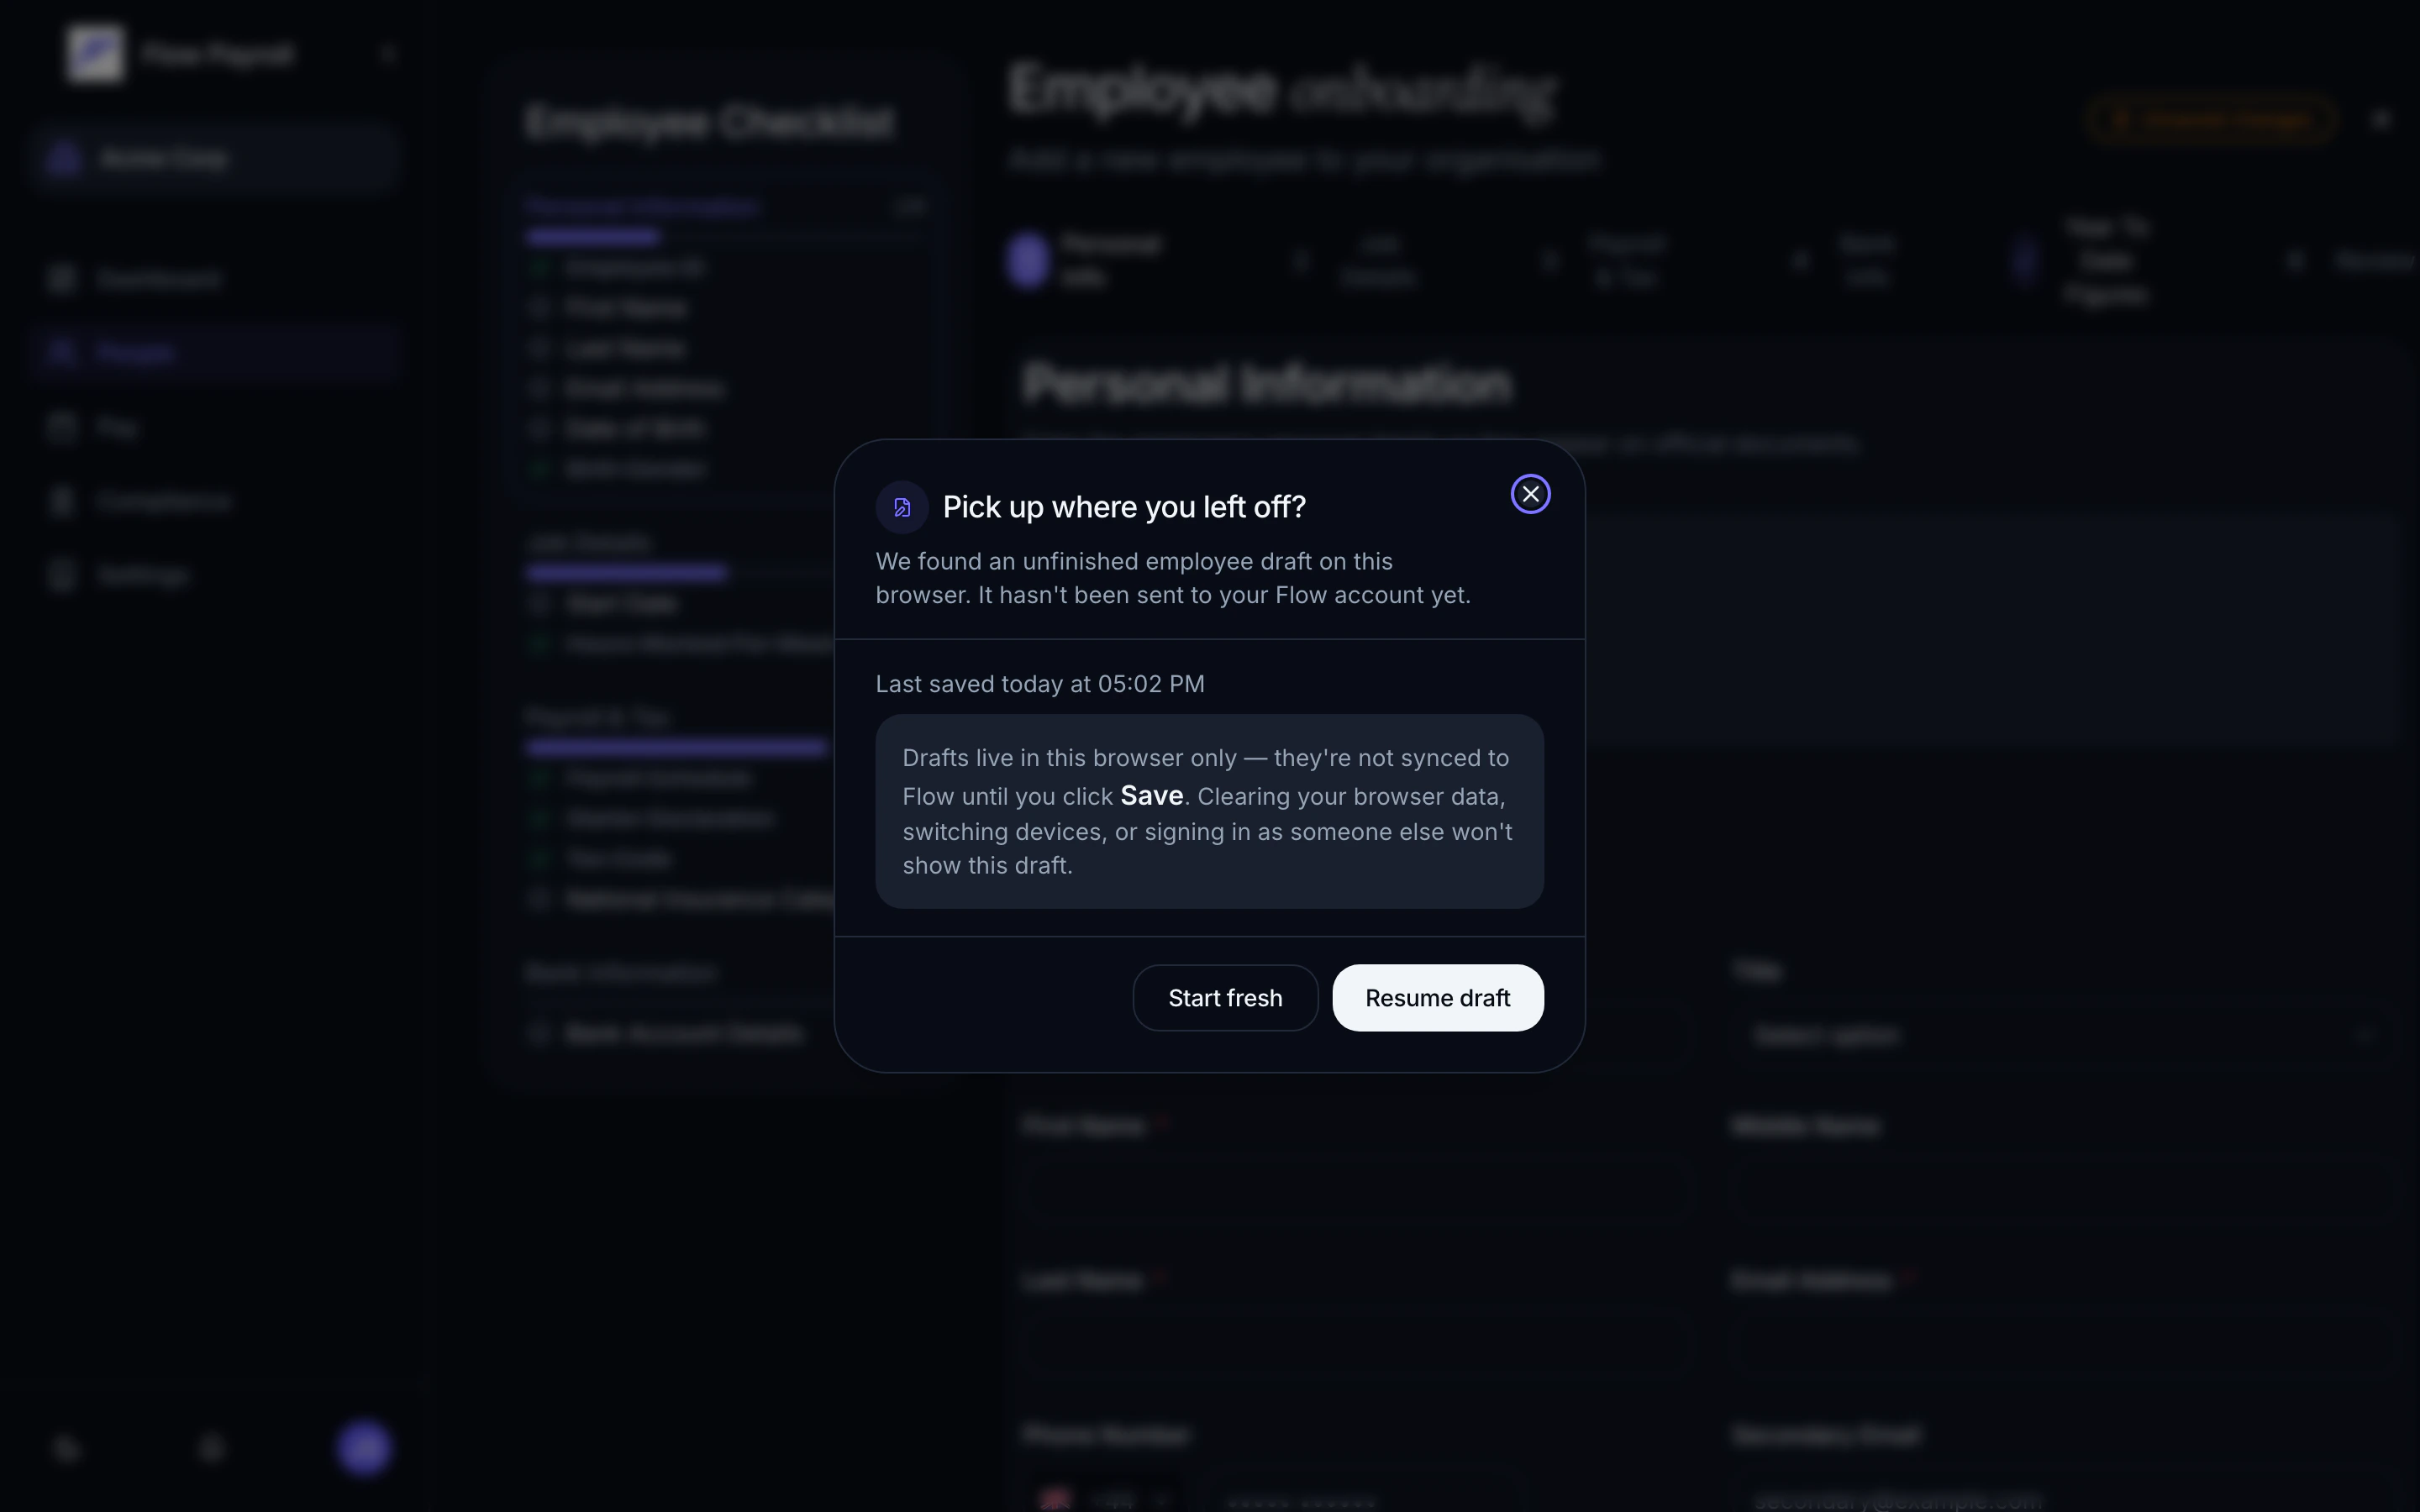
The wizard saves your progress automatically as you type. If you navigate away mid-onboarding, Flow Payroll offers to resume your draft when you return. Discard a draft to start fresh.
## Importing employees via CSV
For bulk onboarding — for example when migrating from another system — use the CSV importer.
On the **Team** tab, click **Import CSV**. The import modal opens.
Select **New starters** for employees who have not been in Flow Payroll before, or **Migration** if you are importing employees part-way through a tax year and want to carry in year-to-date figures. Migration mode adds optional YTD fields and relaxes the starter declaration requirement.
Upload a `.csv` file. The importer auto-detects column headers using fuzzy matching — it recognises a wide range of names for each field (for example "Date of birth", "DOB", and "BirthDate" all map to the birth date field). Review the column mapping and correct any mismatches.
The importer validates every row against the same rules as the manual form. Rows with errors are flagged in red with a description of each problem. Fix them in your CSV and re-upload, or correct individual cells in the preview. Rows with only warnings (such as an unusual postcode format) can still be imported.
Click **Import** to create all valid rows as employee records.
### Required columns for new starters
| Column | Notes |
| ------------------- | ----------------------------------- |
| First name | |
| Last name | |
| Email | |
| Birth date | DD/MM/YYYY or YYYY-MM-DD |
| Birth gender | Male or Female |
| Start date | DD/MM/YYYY or YYYY-MM-DD |
| Starter declaration | A, B, or C |
| Hours worked | Band — for example "Above 30 hours" |
All other columns (NI number, tax code, NI category, bank details, address, salary, YTD figures, etc.) are optional but strongly recommended.
If you provide bank details, all three fields — account holder name, account number, and sort code — must be present for the same employee.
## Where to go next
View and edit employee records after onboarding.
Process a leaver and issue a P45.
Include your new starter in their first pay run.
Understand how new starters are assessed for pension.
## Before you start
Have these details to hand for each new starter:
* Full legal name, email address, date of birth, and birth gender.
* National Insurance number (or at least two lines of home address if no NI number yet).
* Start date and starter declaration (A, B, or C).
* Tax code — if you have a P45 from a previous employer, bring the P45 gross and tax figures too.
* NI category (usually A for employees under State Pension age).
* Bank account details (sort code, account number, account holder name).
* The payroll schedule this person belongs to.
## Adding an employee individually
Go to **People**, make sure you are on the **Team** tab, and click **Add employee**. The wizard opens with a checklist sidebar on the left that tracks your progress through each step.
Enter the employee's personal details exactly as they appear on official documents — HMRC validates these fields on the FPS. Required fields are:
* **Employee ID** (auto-generated, but you can change it)
* **First name** and **last name**
* **Email address**
* **Date of birth**
* **Birth gender**
Optional but useful: title, middle name, phone number, NI number, passport number, marital status, home address, and tags. Partner details (name and NI number) are needed for Statutory Shared Parental Pay.
If you don't have the NI number yet, enter at least two lines of the employee's home address — HMRC requires one or the other on the FPS.
Fill in the employment specifics:
* **Start date** — required.
* **Hours worked per week** — choose the band (up to 16, 16–24, 24–30, above 30, or other). This is an HMRC-required field.
* **Job title** and **department** — optional, but used for filtering and reporting.
* **Working pattern** — tick the days the employee typically works.
* **Irregular payment pattern** — toggle on if pay varies and there is no regular cycle.
* **Off payroll worker (IR35)** — toggle on for workers inside IR35.
This step contains four required items and several optional ones.
**Required:**
* **Payroll schedule** — assign the employee to an existing pay run configuration.
* **Starter declaration** — select A, B, or C based on what the employee has told you:
* **A** — first job since 6 April, no other job or pension.
* **B** — this is their only job (they may have another source of income but no other employment).
* **C** — they have another job or receive a pension.
* **Tax code** — enter the code for the current tax year (for example `1257L`). If you have a P45 from the previous employer, use the code shown there. Otherwise use the emergency code appropriate to the starter declaration. Tick **W1/M1** if the code should be applied on a non-cumulative basis.
* **NI category** — select the appropriate HMRC NI category letter. Category **A** applies to most employees. The wizard can suggest a category based on date of birth when you have provided it.
**Optional:**
* **Salary** — the annual gross salary for reference.
* **Director settings** — appointment date and NIC calculation method if the employee is a company director.
* **Student loan** — plan type (Plan 1, 2, 4, or 5) and dates if applicable.
* **Postgraduate loan** — if the employee has a postgraduate loan.
* **Pension** — assign the employee to a pension group at onboarding. Auto-enrolment assessment runs every pay run regardless, but you can manually assign a group here.
* **Holiday policy** — attach a holiday accrual policy.
If you have the employee's P45 from a previous employer, enter the **previous employment gross taxable pay** and **previous employment tax paid** in the **Payroll & tax** tab after onboarding, or supply them in the **Previous employment** card inside the wizard's Payroll & tax step. This ensures tax is calculated correctly in the first pay run.
Enter the employee's bank account details. All three fields are required when providing bank details:
* **Account holder name**
* **Account number** (8 digits)
* **Sort code** (6 digits)
You can add more than one account and set the percentage of pay allocated to each. The percentages must total 100.
This step is for employees joining mid-tax-year who have already had pay processed elsewhere. Enter the cumulative figures from their P60 or last payslip so that tax and NI calculations for the remainder of the year are correct:
* YTD gross, taxable pay, and tax paid.
* YTD employee and employer NI.
* YTD student loan and postgraduate loan deductions.
* Statutory pay received to date (SSP, SMP, SPP, SAP, ShPP, SPBP, SNCP).
* Pension contributions.
You can skip this step if the employee is joining at the start of the tax year or if you are onboarding them for the first time and have no prior figures.
The **Review** step shows a summary of every section. Scroll through to check the details. Click **Save employee** to create the record. The checklist sidebar shows a tick on every completed section — any incomplete required fields are highlighted before you can save.
After saving, you are taken to the new employee's record where you can continue adding details.
## Draft saving
The wizard saves your progress automatically as you type. If you navigate away mid-onboarding, Flow Payroll offers to resume your draft when you return. Discard a draft to start fresh.
## Importing employees via CSV
For bulk onboarding — for example when migrating from another system — use the CSV importer.
On the **Team** tab, click **Import CSV**. The import modal opens.
Select **New starters** for employees who have not been in Flow Payroll before, or **Migration** if you are importing employees part-way through a tax year and want to carry in year-to-date figures. Migration mode adds optional YTD fields and relaxes the starter declaration requirement.
Upload a `.csv` file. The importer auto-detects column headers using fuzzy matching — it recognises a wide range of names for each field (for example "Date of birth", "DOB", and "BirthDate" all map to the birth date field). Review the column mapping and correct any mismatches.
The importer validates every row against the same rules as the manual form. Rows with errors are flagged in red with a description of each problem. Fix them in your CSV and re-upload, or correct individual cells in the preview. Rows with only warnings (such as an unusual postcode format) can still be imported.
Click **Import** to create all valid rows as employee records.
### Required columns for new starters
| Column | Notes |
| ------------------- | ----------------------------------- |
| First name | |
| Last name | |
| Email | |
| Birth date | DD/MM/YYYY or YYYY-MM-DD |
| Birth gender | Male or Female |
| Start date | DD/MM/YYYY or YYYY-MM-DD |
| Starter declaration | A, B, or C |
| Hours worked | Band — for example "Above 30 hours" |
All other columns (NI number, tax code, NI category, bank details, address, salary, YTD figures, etc.) are optional but strongly recommended.
If you provide bank details, all three fields — account holder name, account number, and sort code — must be present for the same employee.
## Where to go next
View and edit employee records after onboarding.
Process a leaver and issue a P45.
Include your new starter in their first pay run.
Understand how new starters are assessed for pension.