

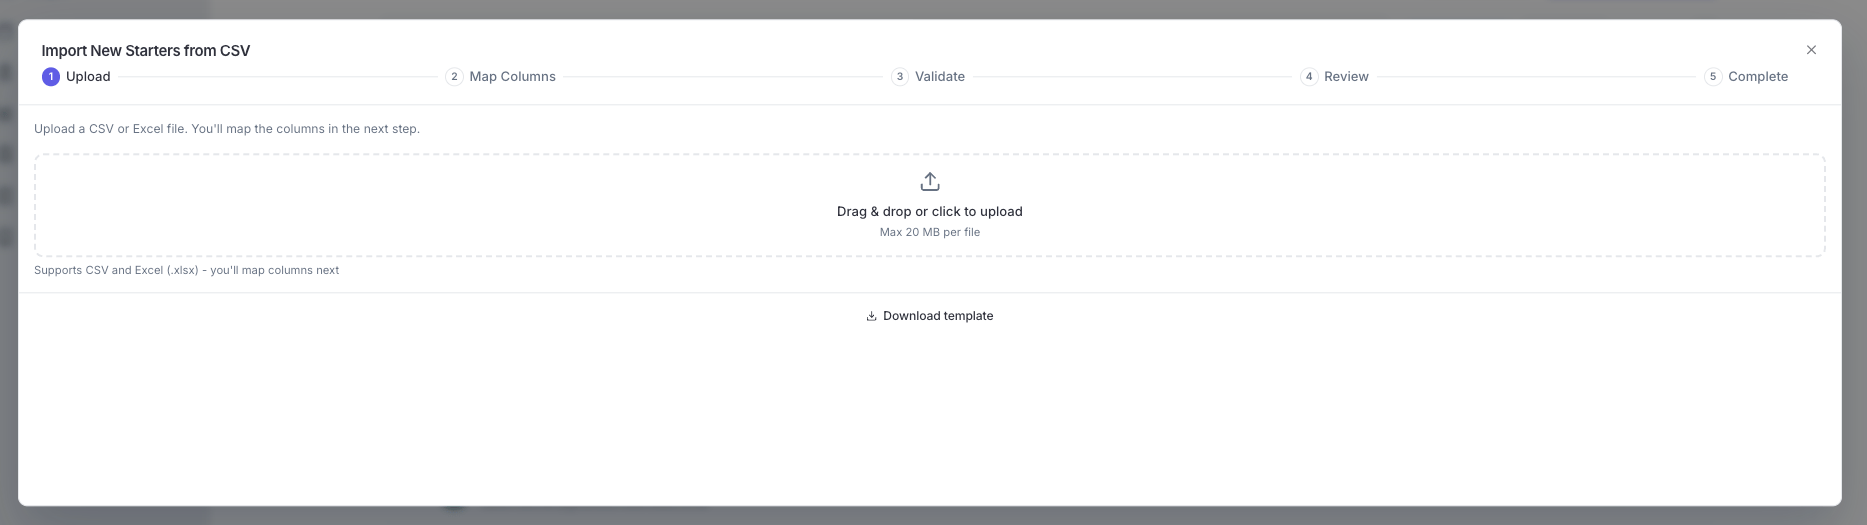
The import wizard — the same five steps everywhere in Flow Payroll
Where you can import
Each import accepts different columns, but the wizard itself always works the same way. Every import moves through five steps: Upload, Map Columns, Validate, Review, and Complete.
Step 1 — Upload
Drag and drop a file, or click to browse. The importer accepts:- CSV (
.csv) - Excel (
.xlsxor.xls) — Flow picks the sheet with your data automatically - One file at a time, up to 20 MB
Step 2 — Map Columns
The mapping step lists every Flow field with the CSV column it matched, a default value, and sample values from your file so you can sanity-check each match at a glance.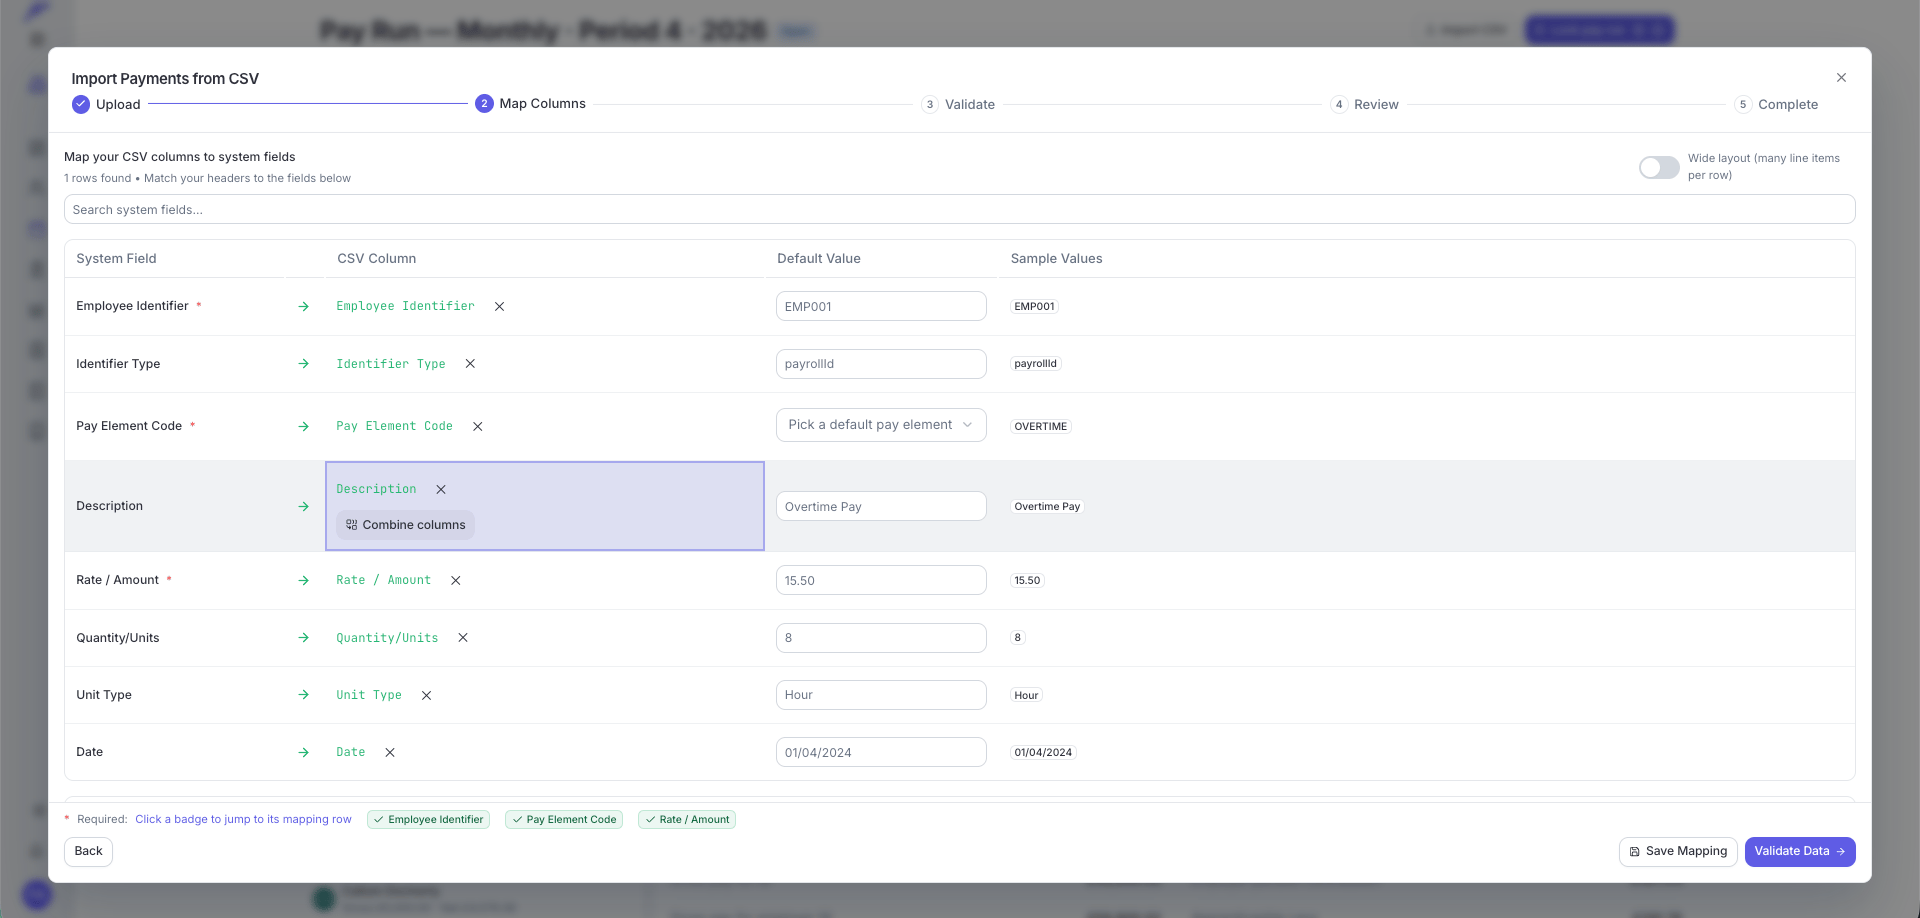
Mapping CSV columns to system fields on a payments import
- Auto-matching — the importer recognises a wide range of header names for each field (“Date of birth”, “DOB”, and “BirthDate” all map to the birth date field). On employee imports each match also gets a confidence badge: green High confidence matches are safe to accept, amber Review match ones deserve a look.
- Required fields — fields marked
*must be mapped before you can continue. The badges along the bottom of the step show each required field, green with a tick once it’s satisfied; click a badge to jump to its row. - Default value — every field takes an optional default, applied whenever the CSV cell is empty or the field has no column at all. Setting a default satisfies a required field, which is handy when your export simply doesn’t carry a column Flow needs (for example, a fixed Payroll Config for every imported employee).
- Combine columns — on description fields you can build the value from several columns instead of one. Click Combine columns and type a template such as
{Site} – {Shift}; typing{opens a column picker, and a live preview shows the result from your first row. If a column is empty for a row, the separator next to it is dropped, so you never import dangling dashes. - Search — with long field lists (employee imports have 60+), use Search system fields… to jump to a field.
Save the mapping once, reuse it forever
Mapping columns is a one-time job. When you’re happy with the mapping, click Save Mapping, give it a name — “BambooHR export”, “Sage payroll lines” — and it’s stored for your whole organisation.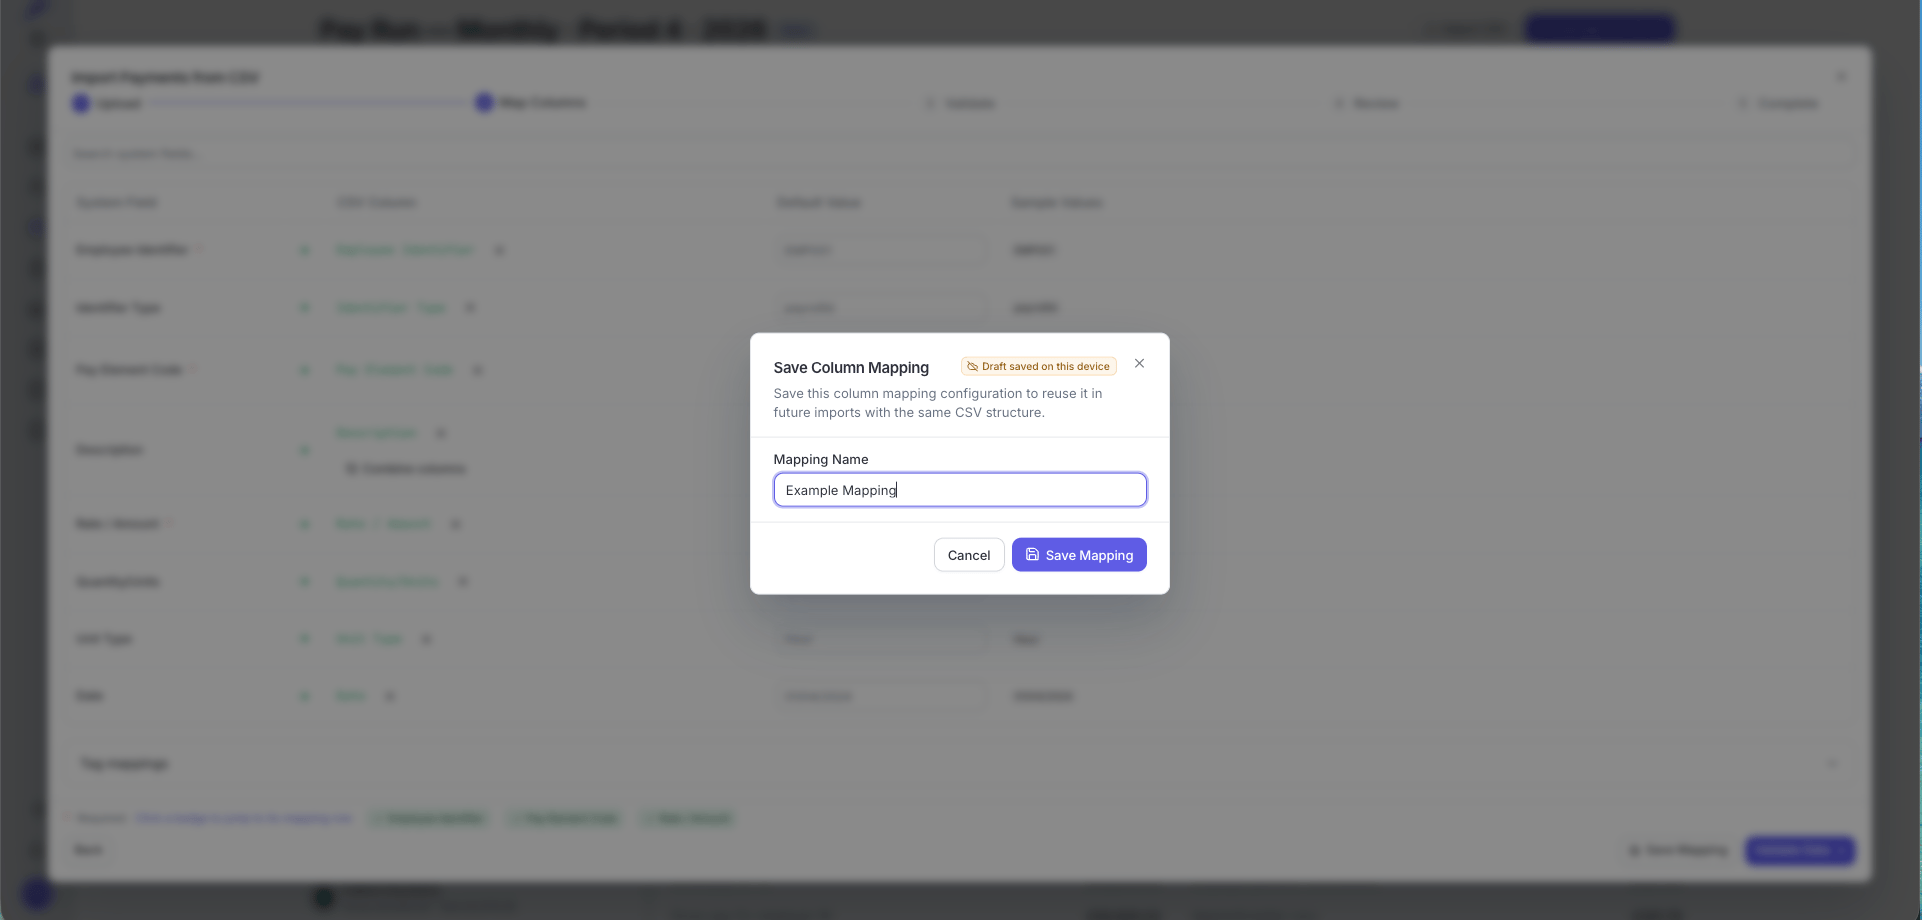
Saving a column mapping for reuse
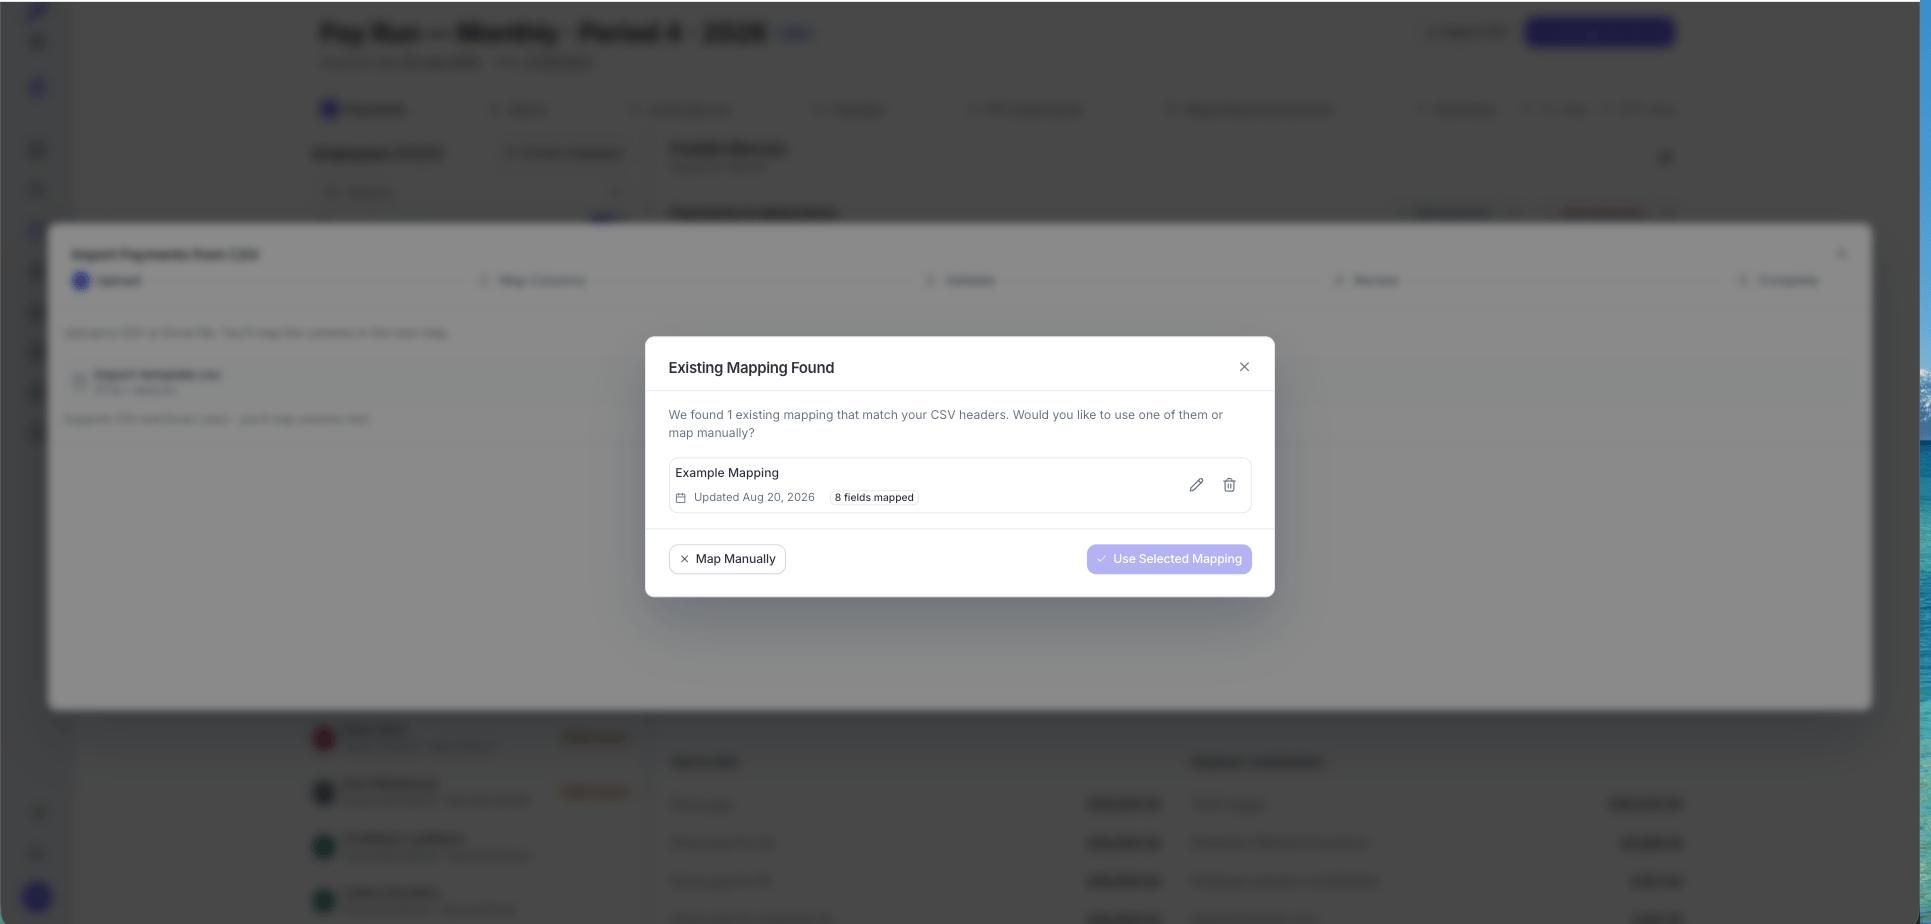
A matching saved mapping is offered as soon as the file is uploaded
- Saved mappings are shared across your organisation and scoped to the import type — an employee mapping is never offered on a payments import.
- To change a saved mapping, load it, adjust the columns, and click Update mapping — or Save as new to keep both versions.
- Rename or delete a mapping from the pencil and bin icons wherever it’s listed.
- The Draft saved on this device badge in the save dialog refers only to the name you’re typing, kept in your browser. The mapping itself is only stored once you click Save Mapping.
Steps 3 and 4 — Validate and Review
Every row is checked against the same rules as manual entry — formats, required values, and consistency (for example, that a pay element code actually exists). The review step then summarises the result in four cards — Total Rows, Valid, Warnings, Errors — and clicking a card filters the row table beneath it.- Rows with warnings are imported. Warnings flag things worth checking — an unusually high amount, an odd postcode — but don’t block the row.
- Rows with errors are skipped. The import goes ahead with the valid rows; errored rows are left out.
- Errors can’t be edited in the wizard. Click Download Errors to get a CSV of just the failed rows with a column describing each problem, fix it in your spreadsheet, and re-upload — your saved mapping makes the second pass instant. Alternatively, go Back to mapping if the fix is a wrong column match or a missing default.
Step 5 — Complete
The final step confirms how many rows were imported. If any rows failed at this stage — for example, a conflict with an existing record — they’re listed with the reason, and Download Failures gives you a CSV of just those rows to correct and re-import. On a fully successful import the page refreshes automatically after a few seconds.Where to go next
Onboarding employees
Import new starters or migrate a whole workforce, year-to-date figures included.
Running a pay run
Import payments in bulk — including the wide layout for one-row-per-employee files.
Pay elements
Set up or import the pay elements your payment lines reference.
Statutory payments
Bring active SSP, SMP, and other statutory payments over from a previous provider.
Payroll Journals
Import journal mappings from Sage, Xero, Staffology, IRIS, and other systems.